The Pink Layer
I could not find any rose-colored filament on line or at my local store. So I decided to try a method I had read about: coloring filament with a Sharpie pen. The idea is that you hold a pen against the filament before it goes into the print head. So I bought some light pink PLA filament and some black, brown, and gold pens.

I downloaded a pen-holding device from Thingiverse and printed it. The filament goes in the top, rubs on the pens, and comes out the bottom. Unfortunately it did not work with the design of my printer because the filament goes up and then down into the top of the housing. I stuck the holder to the housing, but it just put way too much stress on the filament and caused it to fail to feed. This would work with a printer where the filament feeds straight down, but I can't use it..

So I held the pen by hand on some test prints. I really didn't want a lot of color, I wanted it to be kind of blotchy like the watercolor aura. With the concentric top layer I used, and coloring several inches of filament, the color goes round and round and makes an agate-like layered pattern. And the heating / mixing of the ink came out kind of unexpectedly: black turned to purple. Brown came out kind of orange-brown. Gold glitter didn't seem to do much at all. (The irregular black line is one I drew later for another purpose.) This might be useful in some future project but it's not what I was going for.

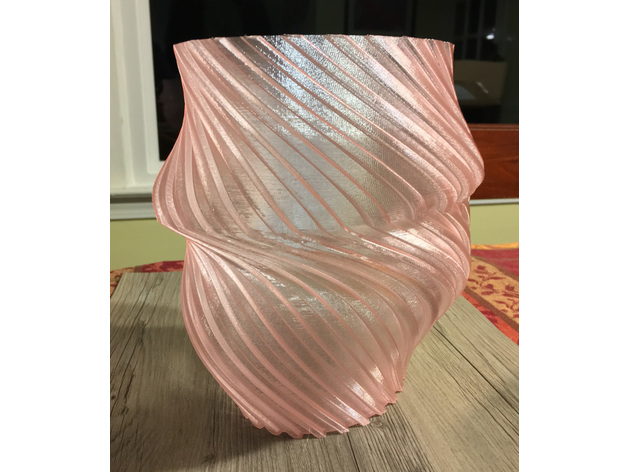
I decided I could work with this by using very intermittent dots of brown ink which turned into a rather light halo. Small dots of ink smear out into lines, and if they are small enough then the lines kind of come and go irregularly as the head goes around. Here's a view of the final effect. Not quite the rose color I was hoping for, but somewhat random and far better than the intense pink PET-G.
The final print

I wanted to print it as large as my printer would allow, which worked out to about 8" x 6.5". But I had noticed before that certain large prints didn't stick well everywhere on the bed, due to uneven heating. This time I decided to produce a heat map. I laid a piece of paper on the bed, set it to 60 degrees Celsius, and used a a laser thermometer to measure different areas. (The paper may have blocked some of the heat.) I didn't record a temp at
every location, but quite a few. In this diagram (Excel Conditional Formatting!) the bold numbers were measured and the italics are averages of the surrounding measurements. The black box is the official "hot zone" where printing happens.
So I made sure to use a fresh, complete coating of Magigoo. The wood background plate did fail to stick at the top and curled up a bit, but it's hardly noticeable. Other than that, the print went pretty well. It took about 7 hours, and all the filament changes went well.
Lettering
Since the new pink is PLA instead of PET-G, it stuck better to the layers above and below. But the final black layer on top of the lettering was pretty narrow and didn't really extrude enough. So there were big gaps in the final lettering. There was no way to go back and reprint just that bit, but I realized a 3D pen might just do the trick. I know people use them to create solid objects in thin air, and 3D printing people use them to join multi-part prints together. I figured it would work to touch up the black on the letters.

I settled on the Mynt3D Professional pen and ordered one from Amazon. I practiced drawing a few objects and letters on glass and on an early sample of the wood PLA to get the hang of it before working on the final picture. The main issue is that you're "painting" with filament in real time, and it's only as accurate as your hand is steady. So with some practice and choosing the right extrusion speed it worked out OK, especially since this project was hand-drawn to begin with. In a more straight and smooth project, maybe not so much. I also used it to fill in a couple places where the Mermaid Tail had some gaps.
Final result
Here are three images of the final piece, lit from different angles so you can see how the light plays on the glitter in the parts with different top-level orientations.
And the final result, framed and ready to give to my grandkid.


